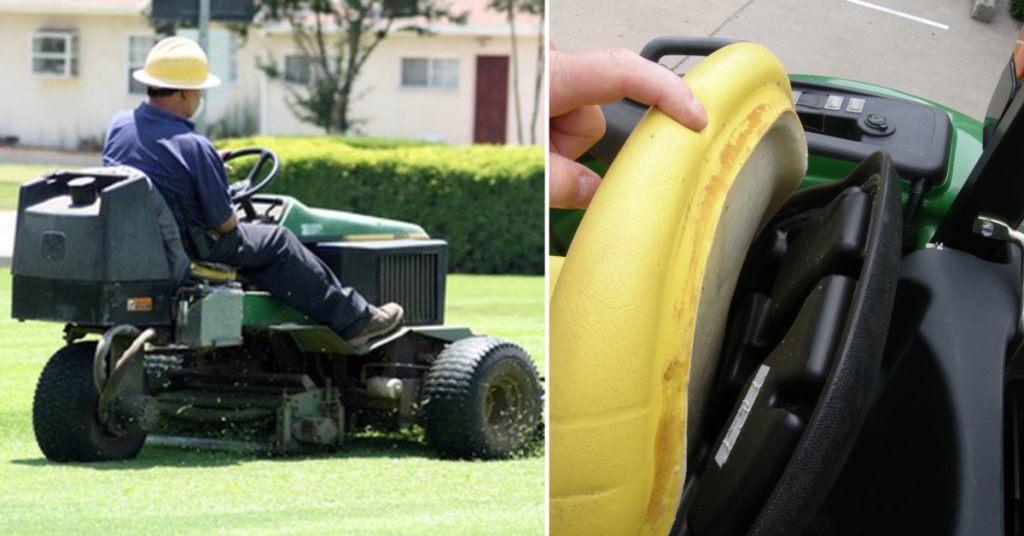
Is your lawn mower seat wobbling or coming loose? Don’t worry, you’re not alone. Many mower owners face this issue, but there’s no need to rush out and buy a new seat or mower. With a bit of elbow grease and the right materials, you can fix it yourself. Let’s dive into the nitty-gritty of how to glue lawn mower seat back on.
Key Takeaways:
- Choose polyurethane adhesive or contact cement for best results
- Clean and prep surfaces thoroughly before gluing
- Apply pressure for 24+ hours during curing
- Allow 24-48 hours for the full adhesive set before use
Why Do Lawn Mower Seats Come Loose?
Before we jump into the fix, let’s look at why this happens:
- Weather exposure
- Constant vibration from use
- Subpar adhesives used in manufacturing
- Material breakdown over time
Understanding these factors helps us tackle the problem head-on.
What You’ll Need
Gather these items before you start:
- Safety gear (gloves, goggles, mask)
- Wire brush or sandpaper
- Cleaning solvent
- Strong adhesive (more on this later)
- Clamps or heavy objects
- Clean rags
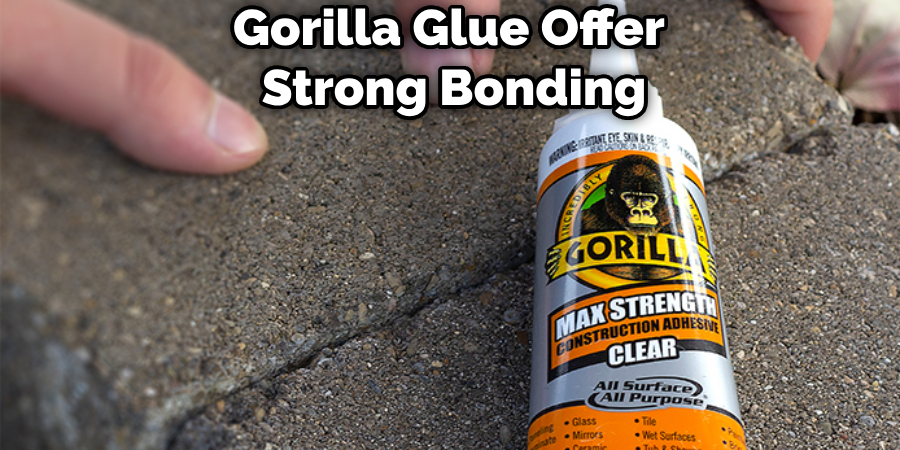
Picking the Perfect Adhesive
Your choice of glue can make or break this repair. Here are the top contenders:
- Polyurethane Adhesive: Brands like Gorilla Glue offer strong bonding and stay somewhat flexible.
- Contact Cement: Provides quick, robust bonding for vinyl and metal.
- Epoxy: Two-part epoxies pack a punch in strength and durability.
- Construction Adhesive: Products like Liquid Nails weather well and bond strongly.
For most lawn mower seats, polyurethane adhesive or contact cement works best due to their flexibility and strong grip.
7 Actionable Step-by-Step for How to Glue Lawn Mower Seat Back on
Here are seven actionable step-by-step on how to glue lawn mower seat back on:
Step 1: Safety First
Wear your protective gear and work in a well-ventilated spot. Your lungs will thank you later!
Step 2: Remove the Seat
If possible, take the seat off the mower. It’ll make your job much easier.
Step 3: Clean and Prep
- Scrub off rust or gunk from the metal base with a wire brush or sandpaper.
- Wipe down both the seat bottom and metal base with solvent.
- Let everything dry completely.
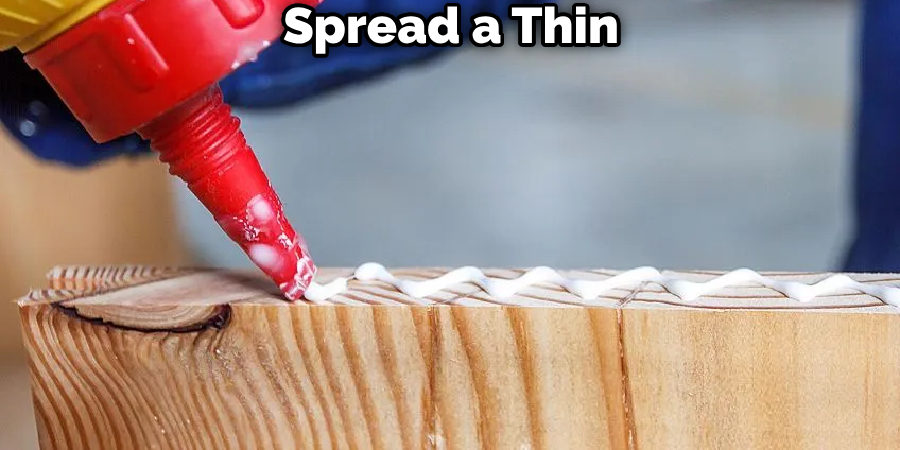
Step 4: Apply the Adhesive
For polyurethane adhesives:
- Spread a thin, even layer on both surfaces.
- Mist lightly with water if the product instructions say so.
For contact cement:
- Apply to both surfaces and wait for it to get tacky (check the product instructions for timing).
Step 5: Stick It Together
- Line up the seat with the base carefully.
- Press down firmly all over to get good contact.
Step 6: Apply Pressure
- Use clamps or heavy objects to press the seat down evenly.
- Keep the pressure on for at least 24 hours, or however long the adhesive instructions recommend.
Step 7: Let It Cure
- Most adhesives need 24-48 hours to fully set.
- Don’t use your mower during this time. Give that bond time to strengthen!
You Can Check It Out to Clean Glue Off Leather.
3 Tips for a Long-Lasting Fix
- Regular TLC: Clean your mower seat often and use a UV protectant to keep it in good shape.
- Store Smart: When you’re not mowing, keep your machine under cover to shield it from the elements.
- Extra Protection: After gluing, consider running a thin bead of silicone sealant around the seat edge to keep moisture out.

When to Throw in the Towel
While fixing your seat is usually the way to go, sometimes replacement is the better option:
- If the seat foam is falling apart
- When the vinyl covering is cracked or torn beyond repair
- If the metal base has rusted through
In these cases, a new seat might be your best bet for comfort and longevity.
FAQs About How to Glue Lawn Mower Seat Back on
Why Do Lawn Mower Seats Come Loose?
Lawn mower seats often come loose due to several factors: Weather exposure can degrade materials. Constant vibration from use loosens adhesives. Subpar adhesives used in manufacturing fail over time. The material breaks down from regular wear and tear. Understanding these causes can help address and prevent future issues effectively.
What Materials Do I Need to Glue My Lawn Mower Seat Back on?
To successfully glue your lawn mower seat back on, you’ll need the following materials: Safety gear (gloves, goggles, mask), Wire brush or sandpaper, Cleaning solvent, Strong adhesive (such as polyurethane adhesive, contact cement, epoxy, or construction adhesive), Clamps or heavy objects to apply pressure, Clean rags.
How Do I Choose the Right Adhesive for Gluing My Lawn Mower Seat?
Choosing the right adhesive is crucial for a durable repair. Consider these options: Polyurethane Adhesive: Brands like Gorilla Glue provide strong bonding and flexibility. Contact Cement: Offers quick, robust bonding suitable for vinyl and metal. Epoxy: Two-part epoxies offer exceptional strength and durability. Construction Adhesive: Products like Liquid Nails are weather-resistant and provide a strong bond. For most lawn mower seats, polyurethane adhesive or contact cement works best due to their flexibility and strong grip.
What Are the Steps to Glue My Lawn Mower Seat Back on?
Follow these seven steps to glue your lawn mower seat back on Safety First: Wear protective gear and work in a well-ventilated area. Remove the Seat: If possible, take the seat off the mower for easier handling. Clean and Prep: Remove rust or gunk with a wire brush or sandpaper. Clean both surfaces with solvent and let them dry. Apply the Adhesive: For polyurethane, spread a thin, even layer on both surfaces and mist lightly with water if needed. For contact cement, apply to both surfaces and wait until tacky. Stick It Together: Align the seat with the base and press down firmly. Apply Pressure: Use clamps or heavy objects to press the seat down evenly for at least 24 hours or as recommended by the adhesive instructions. Let It Cure: Allow 24-48 hours for the adhesive to fully set before using the mower.
What Tips Can Help Ensure a Long-lasting Fix for My Lawn Mower Seat?
To ensure a long-lasting repair for your lawn mower seat: Regular TLC: Clean the seat frequently and use UV protectant to prevent degradation. Store Smart: Keep your mower under cover when not in use to protect it from the elements. Extra Protection: After gluing, apply a thin bead of silicone sealant around the seat edge to keep moisture out. Additionally, consider replacing the seat if the foam is deteriorating, the vinyl is irreparably damaged, or the metal base is rusted through.
Wrapping Up
Reattaching your lawn mower seat isn’t rocket science. With the right tools and a bit of patience, you can save some cash and extend your mower’s life. The key? Proper prep work and giving the adhesive enough time to set.
Remember, a well-maintained mower makes for a happy lawn (and a happy you). Now go forth and mow with comfort and pride in your DIY skills!