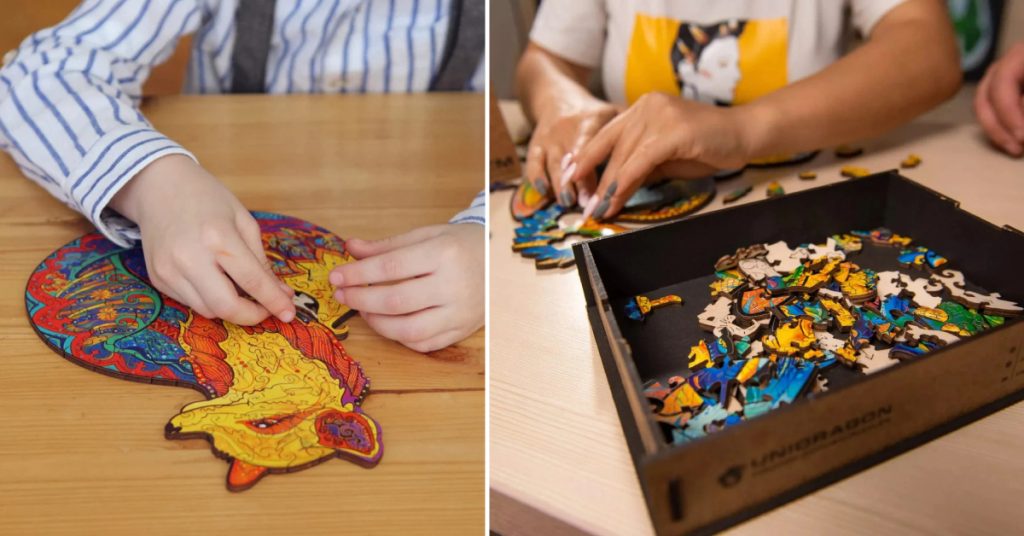
Wooden puzzles are not only entertaining to assemble, but they can also become stunning works of art when completed. If you’ve invested time and effort into assembling a beautiful wooden jigsaw puzzle, you may want to preserve it permanently. In this guide, we’ll walk you through how to glue a wooden puzzle together so you can display it proudly.
Key Takeaways:
- Use clear-drying puzzle glue or wood glue
- Apply thin layers to prevent warping
- Allow thorough drying between steps
- Mount on foam core for added stability
- Frame with spacers to protect the surface
- Avoid direct sunlight and liquid cleaners
Why Glue a Wooden Puzzle?
There are several reasons you might choose to glue your completed wooden puzzle:
- To preserve it as a piece of art
- To hang it on the wall as decor
- To prevent pieces from getting lost
- To keep your hard work intact
However, gluing a wooden puzzle requires some special considerations compared to cardboard puzzles. The wood can warp or curl if not glued properly. Let’s look at the best methods and materials to use.
Materials Needed
- Completed wooden puzzle
- Clear-drying puzzle glue or wood glue
- Foam brush or sponge brush
- Wax paper or parchment paper
- Mounting board (foam core or sturdy cardboard)
- Rolling pin
- Heavy books for weighing it down
- Frame (optional)
7 Authoritative Step-by-Step Guide for How to Glue a Wooden Puzzle Together
Here are seven authoritative step-by-step guides for how to glue a wooden puzzle together:
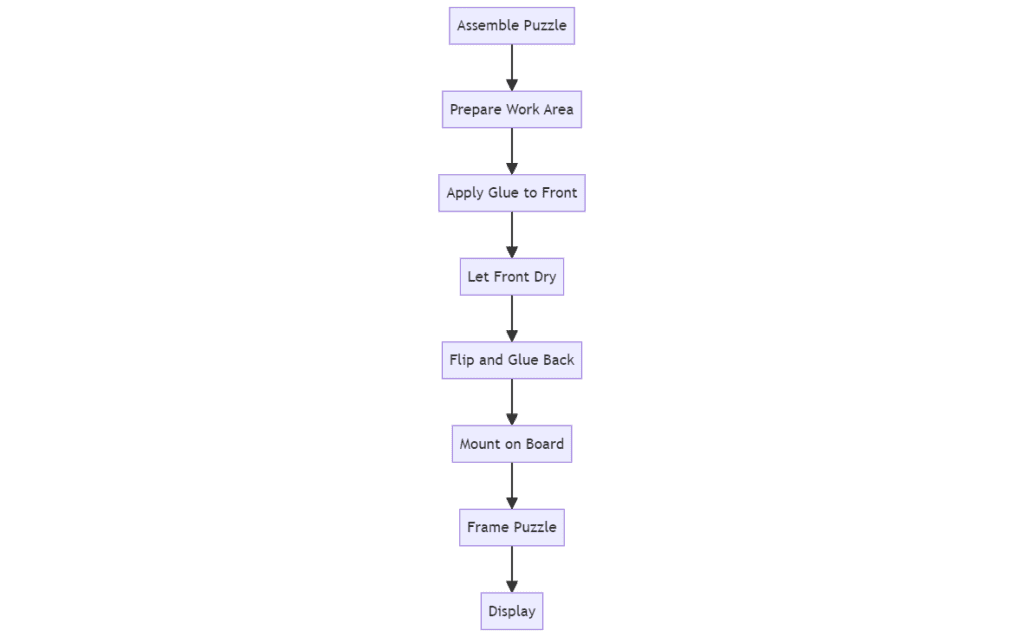
Step 1: Prepare Your Work Area
- Choose a flat, clean surface to work on
- Cover the area with wax paper or parchment paper to protect it
- Have all your materials ready before starting
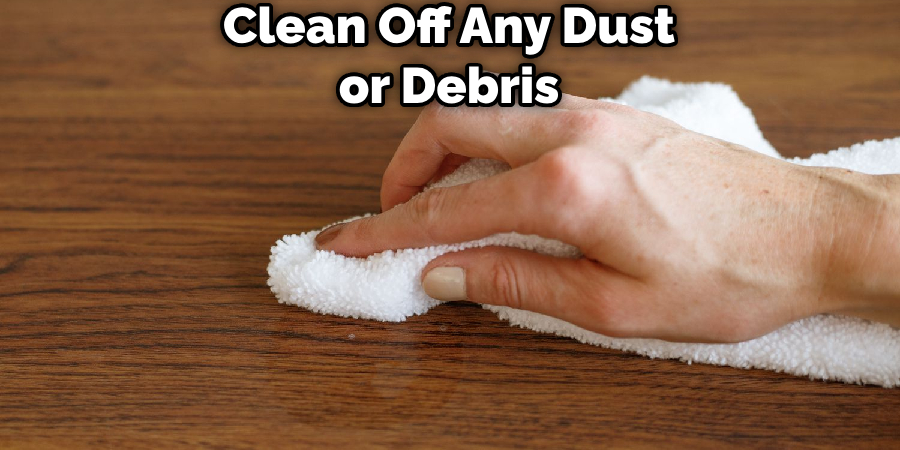
Step 2: Prepare the Puzzle
- Make sure the puzzle is fully assembled and lying flat
- Use a rolling pin to gently flatten any raised pieces
- Clean off any dust or debris from the surface
Step 3: Apply Glue to the Front
- Pour a small amount of glue onto the center of the puzzle
- Use a foam brush to spread a thin, even layer over the entire surface
- Work the glue into the cracks between pieces
- Be careful not to use too much glue, as this can cause warping
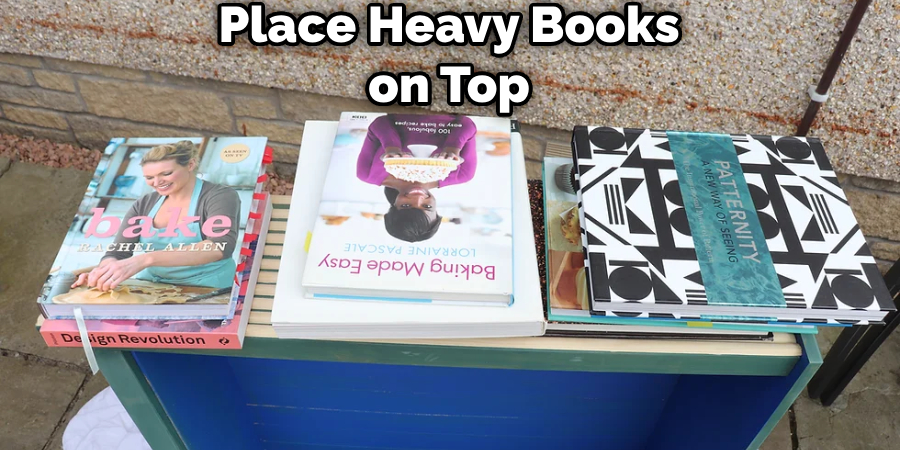
Step 4: Let the Front Dry
- Allow the front to dry completely (usually 2-4 hours)
- Place heavy books on top while drying to keep them flat
Step 5: Flip and Glue the Back
- Once the front is dry, carefully flip the puzzle over
- Apply glue to the back using the same method as the front
- Pay extra attention to the edges and any loose pieces
Step 6: Mount the Puzzle (Optional)
- If mounting, apply glue to a piece of foam core or sturdy cardboard
- Carefully place the puzzle onto the mounting board
- Press gently to ensure good adhesion
- Place heavy books on top and allow to dry overnight
Step 7: Frame the Puzzle (Optional)
- Choose a frame slightly larger than the puzzle to accommodate the thickness
- Use spacers if needed to prevent the glass from pressing on the puzzle surface
- Secure the puzzle in the frame according to the frame’s instructions
Tips for Success
- Use puzzle glue or wood glue specifically – regular white glue may not be strong enough
- Apply thin layers of glue rather than one thick layer to prevent warping
- Work in a well-ventilated area, as some glues have strong fumes
- Consider using a sealant spray on the finished puzzle for extra protection
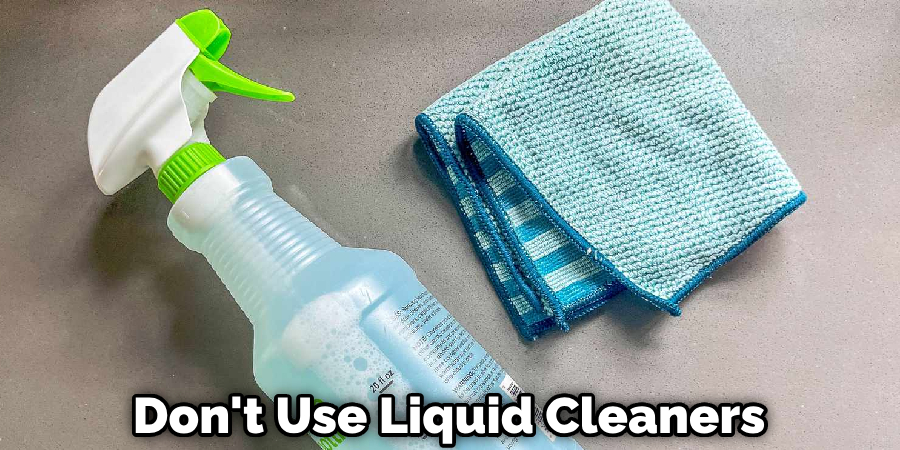
Caring for Your Glued Wooden Puzzle
- Avoid hanging in direct sunlight to prevent fading
- Dust gently with a soft, dry cloth
- Don’t use liquid cleaners on the puzzle surface
- Handle carefully, as glued puzzles can still break if dropped
Alternatives to Gluing
If you’re hesitant to permanently glue your wooden puzzle, consider these alternatives:
- Use a puzzle roll-up mat to store it assembled
- Display it on a flat surface under a sheet of acrylic
- Take a high-quality photo and frame that instead
FAQs About How to Glue a Wooden Puzzle Together
What is the Best Glue for a Wooden Puzzle?
When it comes to gluing a wooden puzzle, the best options include SunsOut Puzzle Preserver and Mod Podge Puzzle Saver. SunsOut Puzzle Preserver is praised for its thinner viscosity and ease of application, while Mod Podge Puzzle Saver is recommended for its quick drying time and easy application. Both are popular choices for preserving wooden puzzles due to their effectiveness and user-friendly features.
Can a Wooden Puzzle Be Glued Together?
Yes, a wooden puzzle can be glued together by carefully applying puzzle glue or regular white glue to the front of the puzzle, spreading it evenly, letting it dry completely, and then sealing the back. Once dried, the puzzle can be displayed or framed as a decorative item. It’s important to use glue that is safe for use on puzzles and does not damage the artwork or colors.
Can You Use Mod Podge on a Wooden Puzzle?
Yes, you can use Mod Podge to seal a wooden puzzle. To do this, apply a light coat of Mod Podge Puzzle Saver to the front of the completed puzzle and let it dry. Then, add a medium layer of the puzzle saver, letting it dry between coats. Once dry, you can mount the puzzle to foam core using Mod Podge, add a mat, and frame it for display. Mod Podge Puzzle Saver dries transparent, so your puzzle will be preserved and ready to showcase.
What is the Best Way to Glue a Puzzle?
To glue a puzzle, start by applying a thin, even layer of puzzle glue or Mod Podge using a foam brush. Once dry, mount the puzzle on cardboard or foam board using puzzle glue or double-sided adhesive and seal the back with glue to ensure it stays together. This process will preserve your completed puzzle for display.
Conclusions
By following these steps, you can successfully glue your wooden puzzle together and create a lasting piece of art. Whether you choose to frame it or display it as is, your preserved puzzle will be a testament to your patience and skill for years to come.
Remember, the key to a successful gluing job is patience and careful application. Take your time, work in thin layers, and you’ll be rewarded with a beautifully preserved wooden puzzle to enjoy for years to come.