Attaching wood trim or framing to a mirror can dramatically enhance its appearance and create a custom look. However, adhering wood to the smooth, non-porous surface of a mirror requires special techniques and materials. This guide will walk you through the process step-by-step of how to glue mirror to wood.
Key Takeaways:
- Choose mirror-safe adhesives like mirror mastic or construction adhesive
- Properly prepare surfaces before application
- Apply adhesive in a zigzag pattern and allow proper curing time
- Use temporary supports for large pieces
3 Reliable Steps for How to Glue Mirror to Wood
Here are three reliable steps for how to glue mirror to wood:
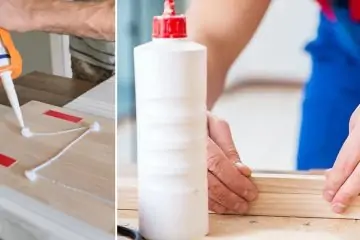
Step 1: Choosing the Right Adhesive
The most critical factor in successfully gluing wood to a mirror is selecting the proper adhesive. Here are the best options:
A. Mirror Mastic
- Specifically designed for bonding mirrors
- Remains flexible to accommodate temperature changes
- Does not damage mirror backing
- Provides a very strong hold
B. Construction Adhesive
- Look for formulas labeled as safe for mirrors
- Offers excellent strength and durability
- Sets quickly for easier installation
C. Silicone Adhesive
- Flexible and moisture-resistant
- Use 100% silicone formulas only
- Good for bathroom applications
Avoid These Adhesives:
- Regular wood glue
- Epoxy
- Super glue
- General-purpose construction adhesives
These can damage the mirror backing or fail to create a lasting bond.
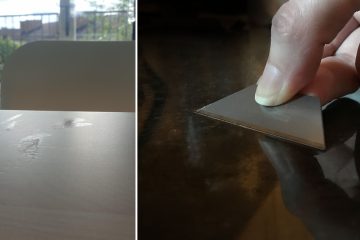
Step 2: Preparation
Proper preparation is key for a successful installation:
- Clean the mirror thoroughly with rubbing alcohol to remove any dirt, oils, or residue.
- Sand the back of the wood lightly to create a better bonding surface. Wipe away all dust.
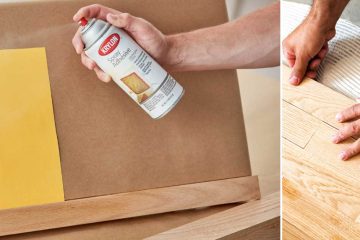
- Paint or finish the wood as desired before attaching. This prevents absorption issues later.
- Measure and cut the wood pieces precisely to fit the mirror dimensions.
- Do a dry fit to ensure everything aligns correctly before applying adhesive.
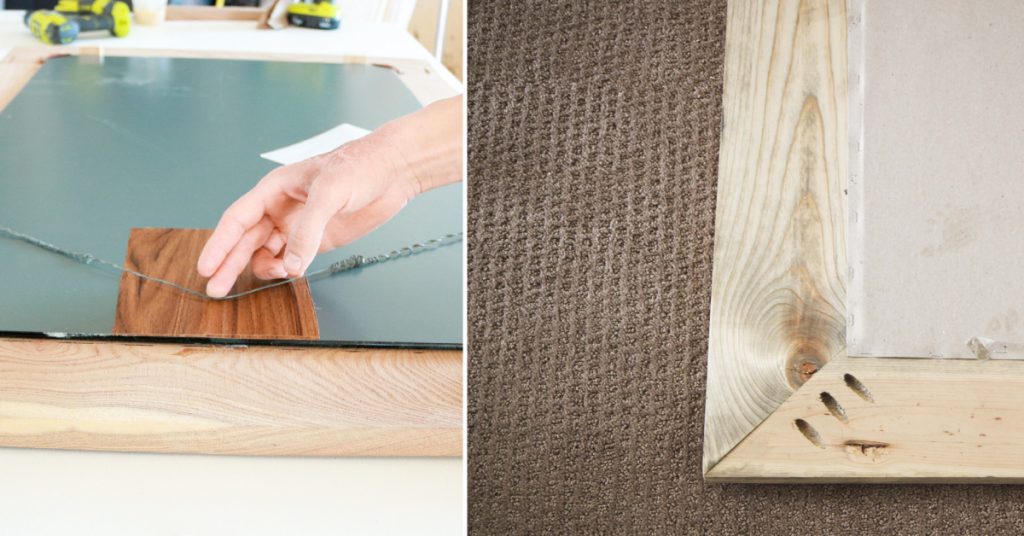
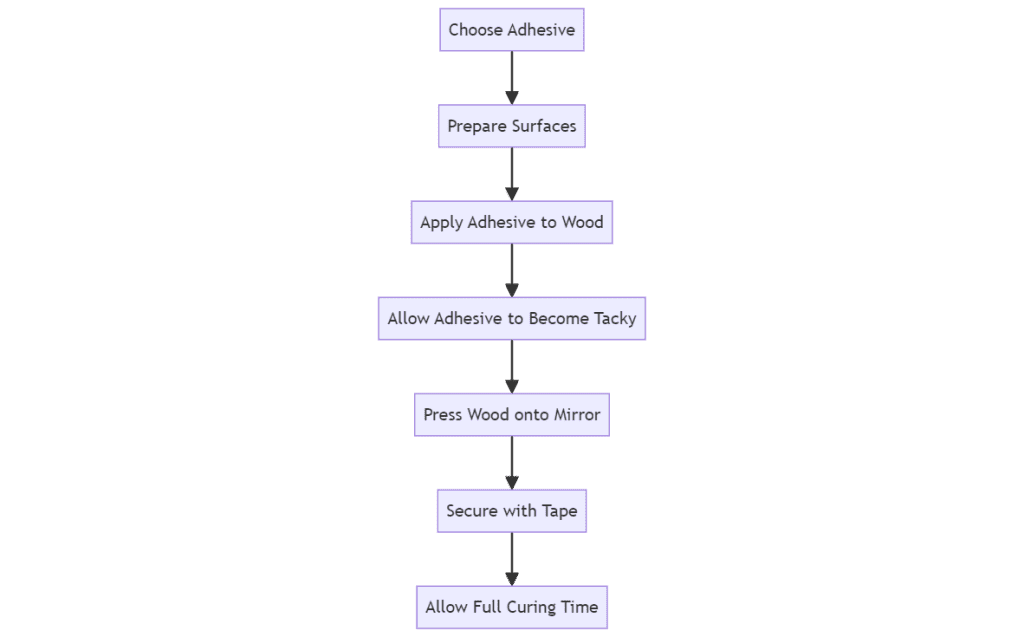
Step 3: Application Technique
Follow these steps for the strongest bond:
- Apply the adhesive to the wood in a zigzag pattern, staying about 1/2 inch from the edges.
- For mirror mastic, allow it to set for 5-10 minutes until tacky before attaching to the mirror.
- Press the wood firmly onto the mirror surface, applying even pressure across the entire piece.
- Use painter’s tape to hold the wood in place while the adhesive cures fully.
- Allow 24-48 hours of curing time before hanging the mirror or applying any stress to the bond.
You Can Check It Out to Glue a Wooden Puzzle Together.

Tips for Success
- Work in a well-ventilated area when using adhesives.
- For large or heavy pieces, use temporary supports like wood blocks until fully cured.
- Apply adhesive sparingly – excess can squeeze out and be visible in the mirror.
- Use a level to ensure the wood trim is perfectly straight during installation.
Common Issues and Solutions
| Problem | Solution |
|---|---|
| Wood sliding down | Use hot glue in addition to mirror adhesive for instant hold |
| Gaps at corners | Apply caulk carefully to fill small gaps |
| Adhesive visible in mirror | Clean immediately with mineral spirits before it dries |
| Wood warping | Use thinner wood or apply finish to all sides before attaching |
Safety Considerations
- Wear gloves and eye protection when working with adhesives.
- Ensure proper ventilation in the work area.
- Follow all manufacturer safety guidelines for the products used.
By following these techniques and using the right materials, you can successfully attach wood to a mirror for a beautiful, custom look that will last for years to come.

FAQs About How to Glue Mirror to Wood
What is the Best Adhesive for Mirrors to Wood?
For mounting mirrors to wood, the best adhesives include Loctite’s Power Grab, Liquid Nails, LePage PL 610 Mirror Adhesive, Gorilla Glue, E6000 Glue, double-sided tape, and Gunther Mirror Mastic. These adhesives provide strong bonds and are designed to ensure durability without damaging the mirror’s backing. Always prepare surfaces properly and allow sufficient curing time to achieve a secure attachment.
How to Get a Mirror to Stick to Wood?
To securely attach a mirror to wood, consider using mirror mastic or adhesive for a flexible and secure bond. Creating a rabbet in the wood frame, using glazing points, and applying a bead of caulk around the edge can also help secure the mirror. Avoid regular silicone caulking and consider specialized sealants or pre-conditioning the wood to prevent damage and warping. Applying glue properly and using quick-set epoxy for small mirrors are also recommended for a secure attachment without risk of damage to the mirror.
Can You Glue Wood to Back of Mirror?
Based on the provided web search results, to attach a mirror to a wood door, it is recommended to use a mirror-friendly adhesive such as Liquid Nails FUZE*IT All Surface Construction Adhesive (LN-2000) to avoid damaging the mirror backing. Apply a 1/4-inch continuous line of adhesive every 4 to 6 inches across the back of the mirror, ensuring there is a base or lip for the mirror to sit on at the bottom of the mirror over 2′ x 2′. Do not seal around the edges and allow 24-48 hours for the mirror to cure.
Can I Glue a Mirror to Plywood?
When gluing a mirror to plywood, it’s essential to select the right adhesive for a secure bond. Popular adhesives recommended by users include Gunther Mirror Mastic, PL Premium, 3M VHB Tape, and clear silicone caulking. It’s also advised to ensure proper surface preparation, consider the weight and size of the mirror, and use additional support such as mirror clips for added security. Careful application and following the manufacturer’s instructions are crucial for a successful bond between the mirror and plywood.
Conclusions
This comprehensive guide covers all the key aspects of gluing wood to a mirror, from selecting the right adhesive to application techniques and troubleshooting common issues. The step-by-step instructions, tips, and safety considerations provide readers with the knowledge needed to complete this project.