Maintaining a beautiful outdoor space requires dedication, effort, and a constant battle against the unrelenting forces of nature. From strong winds that displace carefully arranged mulch to heavy rains that wash away gravel paths, preserving your landscaping vision can often feel like an uphill battle. However, there’s a solution that promises to revolutionize the way you approach garden maintenance: mulch glue.
This innovative product has the power to unlock effortless landscaping bliss, freeing you from the frustrations of constantly rearranging displaced materials and allowing you to embrace the true joys of cultivating an outdoor haven. In this definitive guide, we’ll explore the world of mulch glue, unraveling its benefits, how to use mulch glue, and insider tips to help you achieve a flawlessly maintained landscape with minimal effort.
Key Takeaways:
- Mulch glue secures ground cover materials, preventing displacement by wind, rain, and foot traffic.
- Offers benefits like reduced maintenance, erosion prevention, and water conservation.
- Versatile for various materials like wood chips, gravel, sand, and creative applications.
- Proper surface preparation and application technique are crucial for optimal results.
What is Mulch Glue?
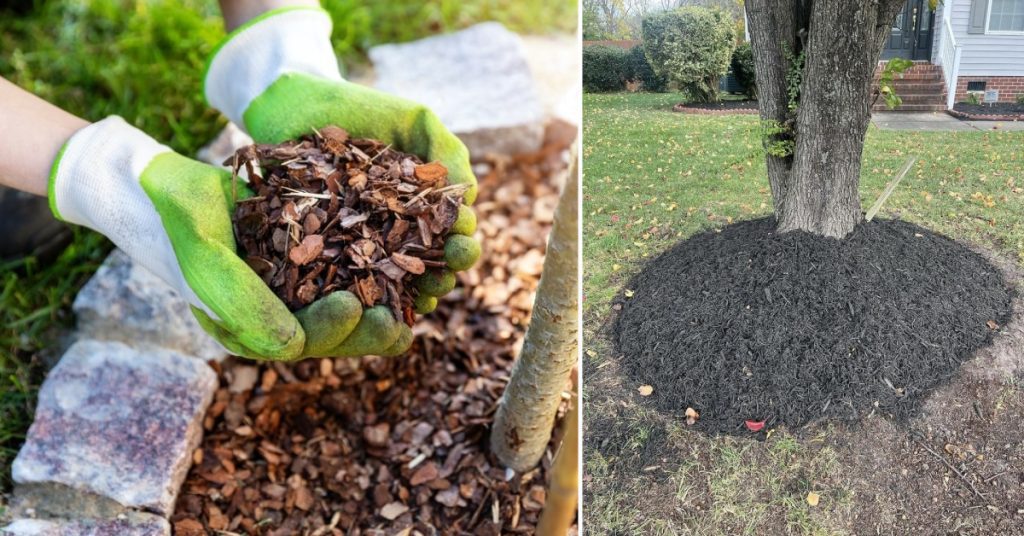
Mulch glue, also known as mulch adhesive or landscape glue, is a specialized liquid adhesive designed to keep your mulch, rocks, gravel, or other ground cover materials firmly in place. Unlike traditional landscaping methods that rely solely on gravity and careful arrangement, mulch glue forms a strong yet flexible bond, ensuring that your meticulously crafted outdoor spaces remain undisturbed, even in the face of harsh weather conditions, foot traffic, or playful pets.
This versatile product can be used to secure a wide range of materials, including wood chips, pine straw, sand, pebbles, and even dirt, making it an invaluable tool for various landscaping applications, such as garden beds, pathways, driveways, and more.
5 Benefits of Using Mulch Glue
Incorporating mulch glue into your gardening routine offers a multitude of benefits that extend far beyond mere aesthetic appeal:
- Unparalleled Visual Appeal: Say goodbye to unsightly gaps, uneven mulch distribution, and scattered gravel. Mulch glue ensures a seamless, well-groomed appearance that complements your landscaping vision, enhancing the overall beauty of your outdoor spaces.
- Reduced Maintenance: With your mulch securely in place, you’ll spend less time raking, sweeping, and repositioning displaced materials, allowing you to focus on other aspects of your garden, such as pruning, planting, or simply enjoying the serene ambiance.
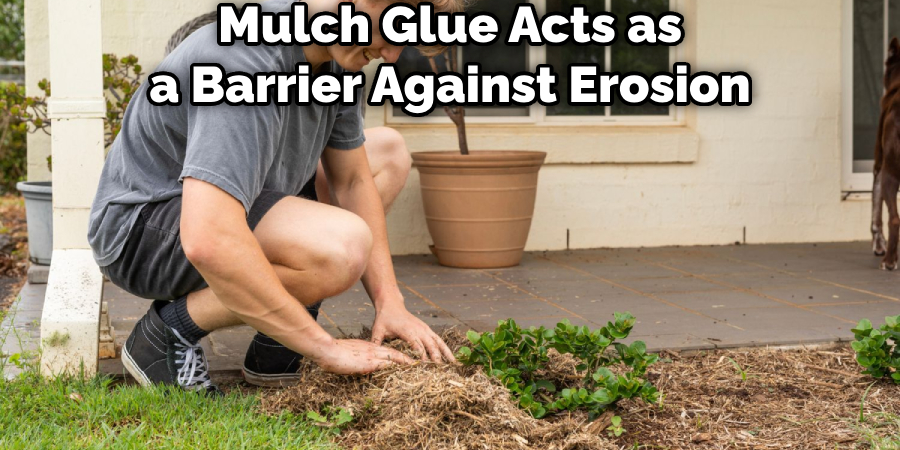
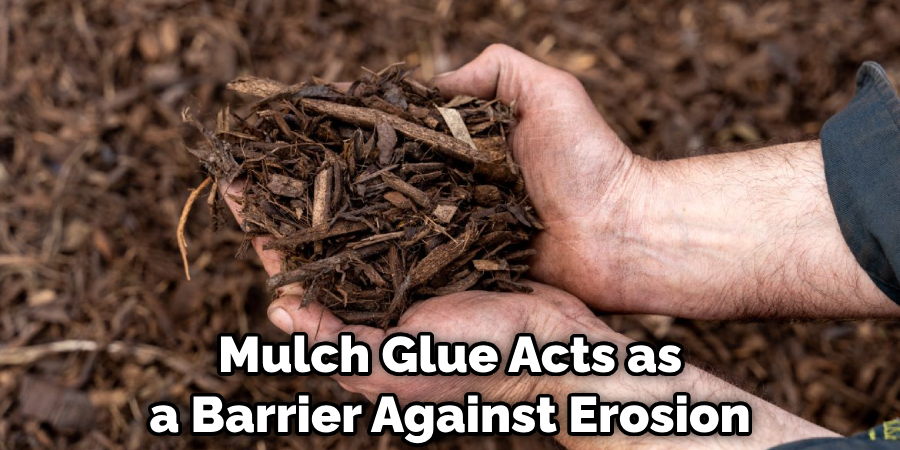
- Erosion Prevention: Mulch glue acts as a barrier against erosion, protecting your valuable topsoil and preventing the formation of unsightly ruts or washouts, particularly in areas prone to heavy rainfall or runoff.
- Water Conservation: By reducing water runoff, mulch glue promotes better water absorption into the soil, ensuring that your plants receive the hydration they need while minimizing water waste, a crucial consideration in regions with water scarcity.
- Environmentally Friendly: Many mulch glue products on the market are formulated to be non-toxic, biodegradable, and safe for use around children, pets, and plants, ensuring an eco-conscious approach to landscaping that aligns with your values.
Choosing the Right Mulch Glue
With a variety of mulch glue options available, it’s essential to choose a product that suits your specific needs and materials. When selecting a mulch glue, consider the following characteristics:
- Material Compatibility: Ensure that the mulch glue is designed specifically for the materials you intend to use, whether it’s traditional wood mulch, decorative rocks, or gravel. Some formulas are tailored for specific applications, while others offer versatile compatibility.
- UV Resistance: Opt for mulch glues that offer UV protection, as prolonged exposure to sunlight can degrade and weaken the adhesive bond over time, compromising the longevity of your application.
- Water Resistance: Look for products that cure to a water-resistant or waterproof film, ensuring that heavy rains or irrigation systems don’t compromise the integrity of the bond.
- Environmental Impact: If eco-friendliness is a priority, choose mulch glues made from plant-based materials or those free from harmful VOCs (volatile organic compounds), ensuring a safe and sustainable approach to landscaping.
Some popular and highly recommended mulch glue brands include PetraTools, Hippie Mulch, and Landscape Loc. These products are known for their efficacy, durability, and commitment to environmental responsibility, making them excellent choices for achieving long-lasting results.
When selecting the appropriate amount of mulch glue, consider factors such as the coverage area and the concentration of the product. Concentrated formulas often offer better performance and may be more cost-effective for larger areas, while ready-to-use options can be more convenient for smaller projects.
Preparing the Surface for How to Use Mulch Glue
Proper surface preparation is crucial for ensuring optimal adhesion and long-lasting results when using mulch glue. Follow these steps to create the ideal foundation:
- Clear the Area: Remove any existing debris, weeds, or loose materials from the surface you intend to treat, ensuring a clean and level canvas for your mulch application.
- Level and Grade: If necessary, level the ground and address any dips or mounds, as an uneven surface can compromise the adhesion of the mulch glue and create an unsightly appearance.
- Install Weed Barrier: Consider laying down a landscape fabric or weed barrier to prevent unwanted growth from disrupting your mulch bed, minimizing future maintenance efforts.
Spread the Mulch: Once the surface is prepared, distribute your mulch, gravel, or desired ground cover evenly across the area, creating a uniform layer of the desired thickness.
By following these steps, you’ll create a solid foundation for your mulch glue application, ensuring optimal adhesion and a professional-looking finish.
5 Ultimate Step-by-Step Process of How to Use Mulch Glue
With your surface prepared, it’s time to unleash the power of mulch glue. Follow these steps to ensure a seamless and long-lasting application:
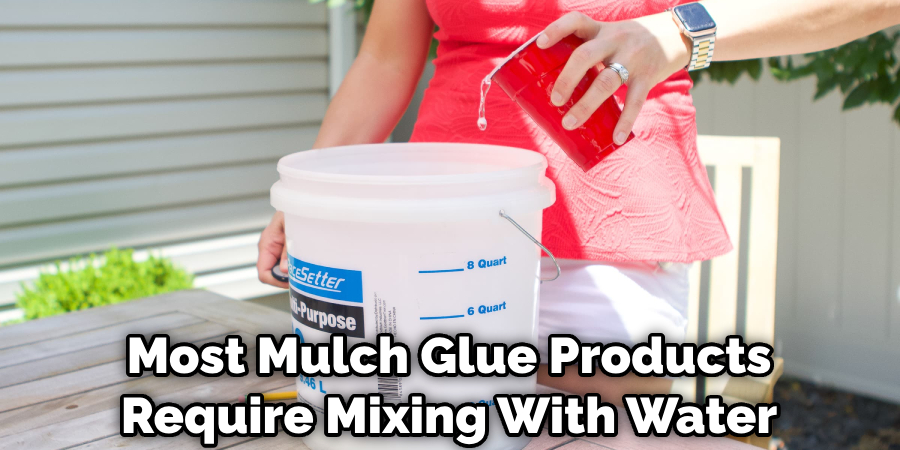
Step 1: Mix the Solution
Most mulch glue products require mixing with water according to the manufacturer’s instructions. Thoroughly combine the components in a garden sprayer or appropriate container, typically using a ratio of two parts water to one part mulch glue concentrate. Shake or stir the mixture well to ensure a uniform consistency.
Step 2: Apply the First Coat
Using broad, even strokes, apply the first coat of mulch glue over the entire surface, ensuring complete coverage. A garden sprayer is highly recommended for optimal control and even distribution, minimizing overspray and waste.
Step 3: Allow Proper Drying Time
Let the first coat dry completely, following the manufacturer’s recommended drying time, typically ranging from 1 to 2 hours. The mulch glue will transition from a milky white color to a clear finish as it dries.
Step 4: Apply Additional Coat
For optimal adhesion and durability, apply a second or even a third coat of mulch glue, allowing each coat to dry thoroughly before proceeding. Multiple coats create a stronger bond, ensuring long-lasting results.
Step 5: Avoid Disturbance
Refrain from walking on or disturbing the treated area until the final coat has fully cured, typically within 24 to 48 hours. This allows the mulch glue to form a secure bond and ensures a seamless finish.
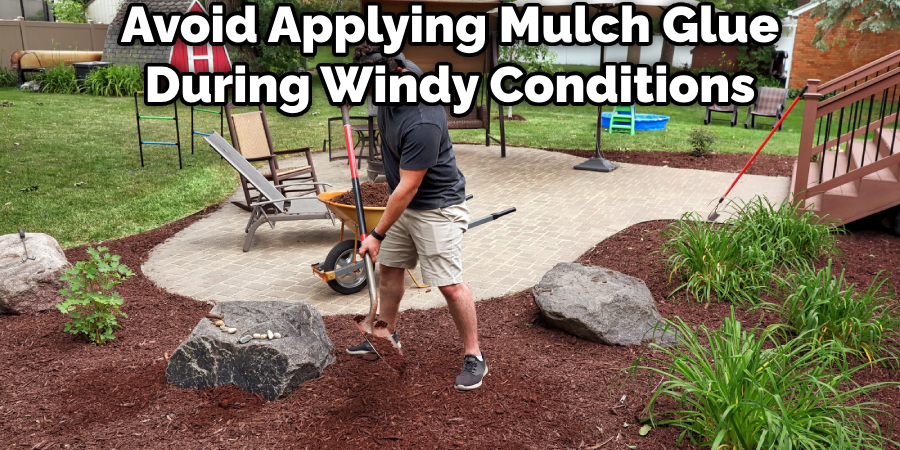
3 Pro Tips for Flawless Application
- Work in Sections: For larger areas, divide the space into manageable sections and work methodically to ensure complete coverage and avoid missing any spots.
- Protect Surrounding Areas: Cover or mask off any surfaces you don’t want to be coated with mulch glue, such as walls, fences, or pavers, to maintain a clean and well-defined appearance.
- Consider Weather Conditions: Avoid applying mulch glue during windy conditions or when rain is expected within 24 hours, as this can compromise the adhesion and curing process.
Design Spotlight: Creative Mulch Glue Uses
While mulch glue excels at keeping traditional landscaping elements like wood chips and gravel neatly in place, its bonding capabilities open up a world of creative possibilities. Designers and homeowners alike are tapping into the versatility of this unique adhesive to bring their landscaping visions to life in innovative ways.
Unique Pathways
With mulch glue, you can create stunning pathways using a variety of materials, from decorative pebbles to recycled glass or seashells. Imagine a winding trail made of tumbled ceramic tiles leading to a secluded garden nook or a sparkling pathway of crushed granite that glistens in the sunlight.
Mulch Mosaics
Embrace your artistic side by arranging mulch, pine straw, or other materials into intricate patterns and designs, then locking them in place with mulch glue. Create one-of-a-kind murals, company logos, or decorative borders that add a personalized touch to your outdoor spaces.
Vertical Gardens
Mulch glue allows you to take your landscaping to new heights – literally. Adhere mulch, moss, or small rocks to vertical surfaces like walls or fences to create lush, living art pieces that inject vibrancy into any setting.

Maintenance and Reapplication
While mulch glue provides a long-lasting solution, regular maintenance is essential to preserve the pristine appearance of your landscaping. Here’s what you need to know:
1. Longevity
Depending on factors like weather conditions, foot traffic, and the quality of the mulch glue used, you can expect your application to last between 9 and 12 months before requiring reapplication.
2. Signs of Needed Reapplication
Keep an eye out for signs that your mulch glue is losing its grip, such as loose or displaced materials, bald spots, or erosion. Addressing these areas promptly will prevent further deterioration.
3. Spot Reapplication vs. Full Reapplication
For minor issues, like a few loose pebbles or mulch clumps, you can opt for spot reapplication. Carefully lift the affected area, apply a fresh coat of mulch glue, and reset the materials.
However, if the problem is widespread or you’ve reached the 9-12 month mark, a full reapplication following the initial application process will likely be necessary.
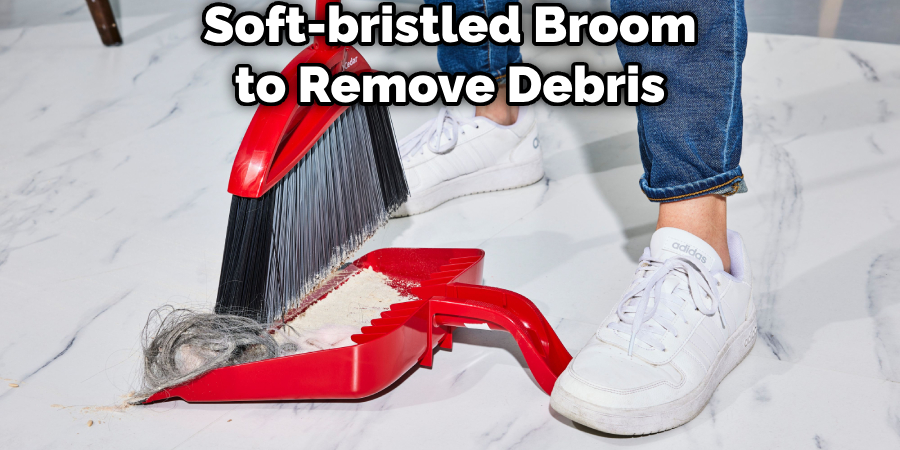
4. Gentle Cleaning and Avoiding Disturbance
To extend the life of your mulch glue application, practice gentle cleaning methods. Use a leaf blower or soft-bristled broom to remove debris, avoiding vigorous raking or disturbance that could loosen the bond. Also, be mindful of heavy foot traffic in treated areas, as this can accelerate wear and tear.
Troubleshooting 3 Common Issues
While mulch glue is a reliable solution, you may encounter some challenges during or after application. Here are some common issues and how to address them:
1. Mulch Still Coming Loose in Areas
If you notice certain spots where the mulch or gravel seems to be lifting or separating, it’s likely due to insufficient adhesive coverage in those areas. Spot-treat these problem zones with an extra coat of mulch glue, ensuring complete saturation.
2. Over-spraying or Uneven Application
Achieving an even, consistent application can be tricky, especially for novice users. If you’ve accidentally over-sprayed onto surfaces you didn’t intend to coat, act quickly to wipe away any excess before it dries. For uneven applications, you may need to apply an additional coat, paying close attention to even distribution.
3. Safety Considerations
While most mulch glue formulas are non-toxic and pet-safe once cured, it’s still important to take precautions during the application process. Wear gloves and protective eyewear, and keep children and pets away from treated areas until the adhesive has fully dried and cured.

Where to Buy Mulch Glue
Ready to experience the transformative power of mulch glue in your own outdoor space? Here are some top suppliers to consider:
1. Online Sources
Amazon offers a wide selection of mulch glue products, including top brands like PetraTools and Hippie Mulch, with user reviews to guide your choice.
Home improvement retailers like Lowe’s and Home Depot carry mulch glue options on their websites for convenient online ordering.
2. Retail Suppliers
For in-person shopping, check your local nurseries, garden centers, and hardware stores, which may stock mulch glue alongside other landscaping supplies.
Big-box stores like Walmart and Target sometimes carry mulch glue options in their outdoor living sections.
Before making your purchase, compare prices and product details across multiple sources to ensure you’re getting the best value for your needs.
FAQs About How to Use Mulch Glue
Does Mulch Glue Work on Sand?
Yes, Mulch Glue does work on sand. Its strong adhesive properties are designed to create a durable bond between the mulch particles and the ground, which effectively prevents displacement caused by environmental factors such as wind and rain. This feature makes it ideal for use in various landscaping scenarios, including areas with sand. Besides enhancing stability and preventing erosion, using Mulch Glue on sand can also contribute to weed control by creating a more solid barrier against weed growth. The product has been specifically highlighted for its effectiveness in securing mulch, pine straw, pebbles, gravel, sand, and dirt, making it a versatile solution for maintaining landscaped surfaces, especially in challenging areas like slopes, around trees, and pathways
Does Mulch Glue Really Work?
Mulch Glue effectively stabilizes loose mulch, reducing erosion, suppressing weeds, and maintaining the aesthetic appeal of landscapes. Its success hinges on proper application, compatibility with the mulch type, and environmental conditions. When applied according to manufacturer guidelines, it can bond mulch pieces together, making it a cost-effective solution for preserving landscaping designs. However, its effectiveness varies, so selecting an eco-friendly product that matches specific landscaping needs is crucial for optimal results.
Do You Add Water to Mulch Glue?
Yes, for many mulch glue products, you do need to add water. These products typically come in concentrated form and require dilution with water before application. The exact ratio of water to mulch glue concentrate will depend on the specific product’s instructions. It’s important to follow the manufacturer’s guidelines regarding the amount of water to add, as the correct ratio is crucial for ensuring the glue’s effectiveness in binding the mulch particles together without compromising its adhesive properties. Always read and adhere to the product label for the best results.
Conclusion
Embracing mulch glue is a game-changer for anyone tired of fighting against the endless battle of displaced mulch, scattered gravel, and an unkempt outdoor appearance. This innovative solution not only enhances the visual appeal of your landscaping but also offers a host of practical benefits, from reduced maintenance to water conservation and erosion prevention.
By following the guidelines outlined in this definitive guide, you’ll unlock the secrets to a flawlessly maintained outdoor haven, free from the frustrations that once plagued your gardening endeavors. Say goodbye to the constant struggle of rearranging displaced materials and hello to the freedom of effortless landscaping bliss.
Invest in mulch glue today and experience the transformative power it can bring to your garden, pathways, and outdoor living spaces. With this versatile adhesive in your arsenal, you’ll be able to embrace the true joys of cultivating an outdoor oasis that reflects your unique style and vision.